Alistbeauty agrees with Alyssa Greenberg
On your wedding day, you’re already wearing the most gorgeous dress of your life, carrying the most beautiful flowers , and rocking the prettiest, glossiest hair your head’s ever seen. The final step? Making sure you’re not partaking in any common wedding makeup mistakes ahead of the big day. Even if you’ve had a skincare and beauty routine down pat since 2008, it’s time to step up your game before you say I Do. Because chances are, you’ve been making some major makeup faux pas without even realizing it.
Before you walk down the aisle, take an extra minute in front of the bathroom mirror and see if you’re guilty of any of these top eight wedding makeup mistakes. Reversing them is the easiest way to a flawless wedding look—even in the unretouched photos!
1. You forget to prep your lips.
A great longwear lipstick can stay put for hours, but it’s no match for champagne toasts and wedding cake —unless you give it a little help. Before you swipe on lip color, create a smooth surface with lip primer we love MAC’s version ($17.50, available at Nordstrom ) ; it makes for easier application and keeps lipstick on way longer.
2. You’re using the wrong foundation shade.
If your base makeup makes you look chalky, it’s time to switch out your shade for summer. Even if you’re planning to go the drugstore, head to a department store first to find your shade. Swipe three options on your jawline, then go to a mirror near a window to see how it looks in natural light. The shade that blends most closely to your skin tone is the winner.
3. Your concealer’s doing double duty.
Wondering why your concealer is settling into the creases under your eyes? It could be because you’re using the same all-purpose pot you use to cover up breakouts. While blemishes usually call for thick, full-coverage concealers , under-eyes benefit more from smoother formulas with light-catching pigments. Try a liquid formula, like Maybelline Dream Lumi Touch Highlighting Concealer ($6.44, available on Amazon ) .
4. You’re not applying primer.
For makeup coverage that lasts all day, from your first look photos all the way to the reception, primer needs to be a regular in your beauty bag . Primer can also come in handy if you have certain skin conditions, like a dry or oily complexion. Start your makeup regimen with this beauty must-have, and then apply foundation.
5. You’re using a dry makeup sponge.
The invention of the BeautyBlender has been a saving grace for makeup aficionados, but only when used properly. Using a dry makeup sponge to blend your makeup means the beauty tool will absorb more of the product, putting your beloved (and most likely expensive) foundation to waste. Splash a little water on your sponge for a streak-free, photo-ready result. Make sure you’re also storing the damp makeup sponge in an open environment after use to prevent mold (the last thing you want on your face).
6. You’re contouring too much.
While Kim K. can rock the contoured look like nobody’s business, this beauty trend seems to be a thing of the past. Plus, too much contour can create a noticeably heavy contrast between your face and the rest of your body, according to makeup expert Sonia Kashuk . For a more natural sculpted look, she recommends applying sheer products under the cheekbones for extra depth.
7. You’re depriving your lashes of maximum lift potential.
Goopy, clumpy eyelashes aren’t the best look on your wedding day. But chances are, you’re weighing your lashes down with every swipe of the mascara wand. If you usually swipe from underneath your lashes upward, try reversing it: Apply mascara from the top of your lashes, sweeping down and out, which makes for the most separation.
8. You’re not refreshing your makeup bag every few months.
Just uncovered your favorite lipstick from 2015 at the bottom of your makeup bag? Toss it before your wedding day. Left in a makeup bag at room temperature, makeup grows bacteria fast—most after six months to a year, but some after just a few months. Check the expiration date at the bottom of each tube (it looks like a jar of face cream with a number in it; that number shows how many months until it’s donezo) and stick to it.
Wedding Photos
Given the amount of photo manipulation we see everywhere from ads to Instagram, it might be natural to think that your wedding pics can be tweaked the same way. I mean, after all, almost anything you dislike in your final gallery can be edited out with Photoshop, right? Not exactly. Photographers caution against assuming that everything can be retouched in the final snaps. Here’s what can and can’t be done.
First Things First
Before actually signing a contract with a photographer, you need to make sure that their style matches what you are actually looking for. “I think the critical first step for clients is to choose the right sort of photographer from the start: people who like a heavily retouched look should pick a photographer who clearly leans toward that style, with lots of computer effects and ‘perfect’ airbrushed-looking subjects,” says Al Fortier, creative director at Alistbeauty. “A reportage or documentary style photographer is going to be less inclined to do major retouching, favoring the natural and organic look they captured in-camera.” The best way to make sure someone will be able to deliver what you want is take a good look at their website and see if their images fit what you have in mind.
Set Clear Expectations
There is hardly one blanket approach, so it’s important to find out what your photographer’s view and policy is on retouching before getting started. “It definitely varies from photographer to photographer, so it’s good to ask from the start what kind of photo retouching, if anything, a wedding photographer provides,” says Al. I generally want to provide a near perfect gallery, so I ask to retouch anything that drives me nuts [like stray hairs or weird things in the background] before I put them on my website. When it’s something beyond my capabilities and it’s bothering me, I’ll send it out to a retoucher.” Someone on Fiverr.com
Small ‘Flaws’
If there’s something about your appearance that you’re insecure about, it’s best to give your photographer a heads up before your big day, as many things can be tweaked for your final images. The important thing is to speak up, because what stands out to you may not for your photographer. “[It’s important] that my clients tell me what they’re self conscious about before we shoot so I can be aware of it and share what retouching may be possible for them,” says Al. “For instance, a client who is insecure about yellowed teeth: I won’t insult anyone by automatically whitening their teeth on my own, but if they request it ahead of time, it’s an easy fix. If someone has bad acne scars and they ask me to fix it, I can also address that in photos that need it. However, I never ‘fix’ anyone’s flaws unless they ask me to. [It’s] sort of rude to assume!”
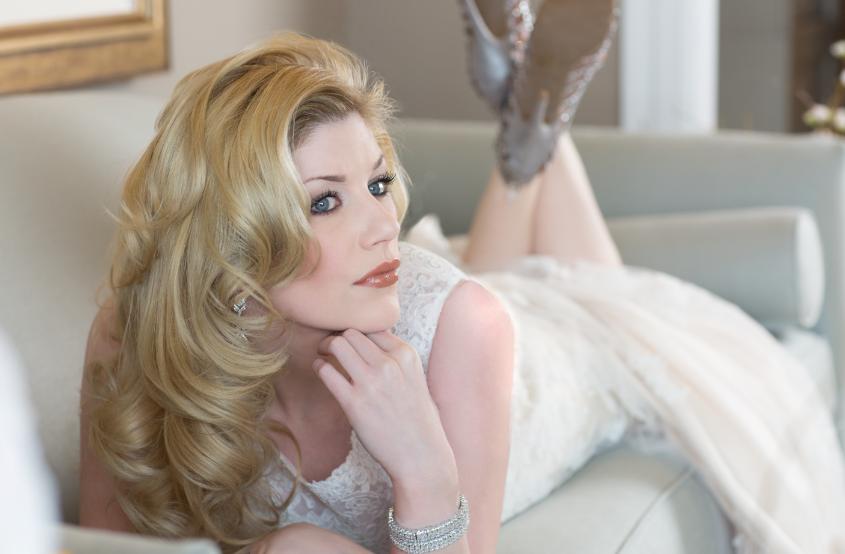
I love this picture but it is retouched a lot. You can tell the modles eyes are not this blue skin is too flawless and Emma had a necklace I did not love with this dress.
Things to Do After Getting Engaged
Your partner popped the question, you said yes, and now you’re engaged ! Congratulations! It’s a big moment, and you’re kicking off a totally special time in your lives. But what should you do after you get engaged? The first steps you take after your engagement will really set you up for a successful wedding planning process. From the fun and exciting to the nitty-gritty, we have a few tasks to get you on your way.
Spread the News
Of course the first thing you’ll want to do after your engagement is tell people about it! Start with your VIPs (think parents, siblings, and grandparents), either sharing the news in person or getting on the phone to tell them what’s just happened. Then, once your inner circle is up to date, you can head to social media with the perfect engagement post.
Get Insurance
Romantic? No. Totally necessary? Yes. Whether a stone gets loose or your ring falls down the garbage disposal, having it properly protected is key. Your partner may have already looked into ring insurance with the jeweler, but if he or she hasn’t yet purchased a policy, you’ll want to do that right away.
Get a Manicure
Now that you’re engaged, all eyes will be on your left hand, so pamper your fingers with a professional mani. Clean cuticles and soft skin will make your newest accessory really pop!
Enjoy the Moment
It’s hard to resist the urge to start planning, but try to take a few days—or a few weeks—to simply be engaged. Embrace the romance with regular date nights, an engagement trip, or even an engagement party. Practice introducing your partner as your fiancé, and enjoy all of the congratulations you’ll get!
Dream Big
Before you get into the details, give yourselves time to dream. Write down what you’d love to have at your wedding, whether it’s a barefoot ceremony in the sand or a bourbon bar at the reception, and start putting together a Pinterest board with your vision. Keep an eye out for common themes, which will help you narrow things down later, and start to define your biggest priorities for the event.
Talk Numbers
Don’t book a single thing before you know how much you’ll have to spend on your wedding. Talk to your parents about what they might be comfortable contributing, and start setting aside savings if you’ll be paying for the event yourselves. Another number to consider? Your guest list! Create a draft guest list to get an idea of how many guests you’ll have, which will play a major role in how far your budget can go and which venues you can look at.
Hire A Pro
If you’re going to work with a wedding planner, hire him or her before you book your venue. Go to your planner with the range of dates you’ve specified, then bring him or her along while you’re doing your venue tours. A planner will be able to give you invaluable insight into spaces, and might be able to recommend something you’d never considered before.
Narrow Down the Date
Before you tour venues or interview majors vendors (like your planner or photographer), you’ll want to have a range of dates in mind. Think about what you’re envisioning for your celebration, from a garden wedding in the spring to a snowy mountaintop fête, then look to your calendars to see when you’re both free. Don’t forget to check in with your VIPs to make sure they’re available, too!
Book Your Venue
With your planner secured, it’s time to sign that venue contract! The space you choose will influence everything from your final guest count to the color palette to the design of your dress, so get this locked in early.
Book Other Major Players
After your planner and venue, your next big bookings should be the photographer, alistbeauty and band or DJ—those professionals who can only take on one event per date. The best might get scooped up quickly, so send out inquiries early! This will give you time to browse portfolios and conduct interviews to help you find exactly what you’re looking for—and your planner will be able to help narrow it down and offer invaluable guidance!
Stay Organized
Whether it’s an online planning tool, a printed wedding planning binder, documents from your wedding planner, or templates from Google Drive, keeping on top of the details is key. Create a comprehensive timeline, track your budget, and scan contracts and receipts to keep all of the details in one place.
More About Us!
Wedding Hair and Makeup
Al Fortier-Parker owner of alistbeauty is a professionally trained hair and makeup artist and one of Toronto’s elite artists specializing in luxury bridal hair and makeup. He has more than 25 years experience in bridal hair and makeup and 30 the hair industry . Al’s skills have allowed him to work with some of Toronto’s leading commercial photographers as well as the Miss Universe Canada Pageant, Wedluxe Magazine, TV, and many others.
Al is a trained esthetician, which gives him a unique and deep understanding of skin and skincare. With his extensive knowledge of skin, hair and make up, Al is able to incorporate all his training for each of his clients and deliver high end results that you would naturally expect from a true professional.
Bridal Makeup and Hair in Toronto
Over the past 25 years, Al has dedicated much of his time training and honing skills primarily for the bridal industry and his clients. Along with a great team of artists, he has helped create hundreds of happy brides and their bridal parties – all with unique and different flairs. Alistbeauty’s bridal hair and makeup has been featured in the pages of Wedluxe, Elegant Weddings, The Knot, Vanity Fair and many more.
Al understands each client will have different needs. As such, alistbeauty takes a truly customized approach to ensure the expectations of all are met. Alistbeauty suggests you book trial for your hair and make-up, during this session we meet and talk about your requirements, concerns and answer any questions you may have. During this trial Al and his artists give you a preview of your hair and make-up style, it is all documented so it is easy to reproduce on the day of your wedding. After this initial meeting with alistbeauty , it is easy to enlist alistbeauty’s wedding hair and make up service on location in Toronto or anywhere. just fill out and the sign the contrast and put your deposit and your day is booked for you.
Alistbeauty strongly believes in no pressure sales as you already have enough stress, anxiety, and other things to take care of before you wedding day. Alistbeauty does not charge extra for travel fees within the Greater Toronto Area or for early morning weddings. There mat be travel fee depending on your location outside of the GTA.
For more information or to schedule your trial hair and makeup session, contact www.alistbeauty.ca today at 416- 5264580.
Toronto Wedding Show
Things to Remember to Do the Night Before Your Wedding
The 6 Costs You Should Cover for Your Bridesmaids
It’s no secret that being a bridesmaid is an expensive role for your friends to take on. They will find themselves paying for pre-wedding events, transportation costs, and of course the dress you’d like them to wear on the big day. So if you’re looking for a way to pick up some of the expenses your bridesmaids may incur , here are 6 things you should pay for, if you can, for your bridal party.
1. A Wedding Survival Kit
Whether it’s a bowl filled with travel-sized toiletries from the drug store or a personalized tote bag filled with emergency items for the day , be sure to equip your bridesmaids with any last-minute must-have items.
2. Their Transportation Home
Since the average wedding day for a bridal party is 10+ hours, be sure to provide your wedding party with transportation home or back to the hotel. You can do this through a taxi service or a scheduled shuttle for all of the guests.
3. Hair and Makeup
If it’s in your budget, a great treat (and gift!) for your bridal party is to pick up the tab on the glam squad, paying for them to get both their hair and makeup done on the wedding day. If you can’t manage to pay for both beauty fees, opt for one or the other. They’ll definitely appreciate the gesture.
4. Bridesmaid Accessories
Any and all items you’d like your bridesmaids to wear on the wedding day to accentuate the dress can be items that you buy for each bridesmaid as the ultimate thank you gift.
5. A Mani/Pedi
There’s no better way to before the wedding than with a group outing to get a mani/pedi, especially when you’re paying for it! Treat your girls to a fun day at the spa, and get wedding-ready while doing so.
6. Alterations
If you’re asking your bridesmaids to buy their dresses themselves, one thing you can do to help keep the costs down is offer to pay for any alterations that they might need. That way, you can be sure the dresses fit optimally and look stunning in photos on your big day.
7 Secrets For The Perfect Eyeliner
Alistbeauty helps with 7 Secrets for the Perfect Eyeliner
There are certain skills in life that you could probably get by without (like learning how to poach an egg or knowing how to do a waterfall braid). But getting your eyeliner straight and even is pretty essential to daily life if you ask us—and also pretty damn tricky. So we polled the women we know who always have impeccably lined eyes for their best tips.
They Use Primer
If smudgy or runny liner is a constant issue for you, try starting off with
a little primer
. Not only will it create a smoother surface for application, but it will also keep things in place as it wears.
They Know Which Formulas Work Best for Them
Generally speaking,
pencils and gel liners
are easier to apply than liquids. So if you’re feeling a bit uncertain about your skills, reach for a more forgiving pencil first, and then you can work your way up to liquid liners.
They Steady Their Elbows
Before you go in with your liner, find a flat surface to steady your elbows against and then draw. Stable arms equal steady lines.
They Rely on More Than One Shade
Use a darker shade (like black or brown) along the upper lash line and don’t worry about making it perfect. Next, take a slightly lighter shade (like gray or bronze) and blend it along the top edge of the line you just drew to hide any unevenness. Note: You can also do this with eye shadow.
They Work Backward
Instead of lining your eyes from the inner corners out, start with the end point and work your way in for better symmetry. This is especially key if you’re rocking a cat-eye look.
They Use Concealer to Clean Up
Though we instinctively reach for remover to fix mistakes, it tends to bleed into the surrounding makeup (which sometimes means having to start all over again). Use your concealer to do the job instead.
They Replace Their Liners Regularly
Most pros recommend
swapping out your liners
every two months (if it’s a gel pot, as they tend to trap moisture and bacteria the easiest) or four to six months (if it’s liquid because they tend to dry out faster) and every year (if it’s pencil). Again, perhaps we should all just be using pencils.
WEDDING INSPIRATION
VINTAGE LAVENDER WEDDING INSPIRATION
Modern motifs meet vintage flair at this lavender wedding
Love the trendiness of mixed metals but know your an old soul? Look no further than this dreamy lavender wedding theme! Pulling inspiration from the historic gadgets and machinery that drive steampunk fashion, the elegant scene contains copper and gold table decor as well as a vintage camera. Leading the colour palette are creamy hues of lavender and yellow in the floral, vintage chair, appliquéd tablecloth, sparkly Jimmy Choo shoes and even stationery suite. Between the baroque dining chairs and the four-tier paper crepe cake, we can’t decide which detail is our favorite!
Photography & Videography: Lula King Photo and Film | Planning, Decor, Rentals & Linens: Raven Luxury Events Inc. | Flowers: Zora’s Flowers | Invitations: Flourish Grace Calligraphy | Cake: MelinArt Cakes | Makeup, Hair & Jewellery: A List Beauty | Dress: Lea-Ann Belter Bridal | Venue: Bowmanville Museum